What is The Vegan(ish) Experiment?

Our family (me, my husband D, and our four-year-old Molly) started 2009 with a mostly-vegan, macrobiotic-inspired diet (although I have to admit, the strict macro rules have pretty much gone out the window). I have seen a marked improvement in my chronic migraines, and I'm enjoying proving that we can make amazing, mouth-watering, memorable food without animal products. For a more in-depth intro, click here.

I stopped updating this blog quite awhile back, when life got in the way. I'm still keeping a mostly vegan kitchen, though, and loving it. Have fun browsing my recipes!

Sunday, March 29, 2009

Day 88: Super-Easy Mexican-Style Pasta

So much for posting more often. Last week was more busy instead of less! I have a whole pile of yummy food pictures, ready to be posted ... when I find the time.

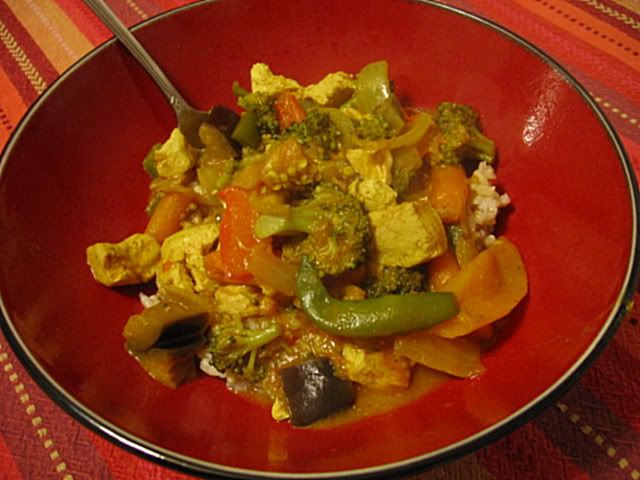
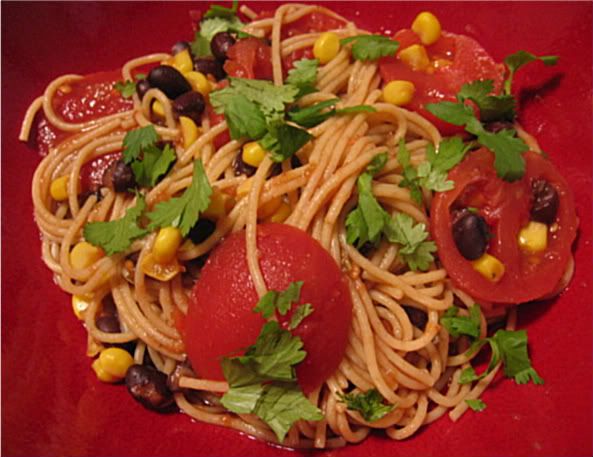
In an effort to save on groceries, I decided that one meal last week should be assembled from solely pantry ingredients. (Except the cilantro, which I already had in the fridge and needed to use up before it went bad.) This dish isn't traditional Mexican (pasta? huh?). But the flavors are Mexican-inspired. And, taking a scant 30 minutes to prepare (including boiling a big pot of water for the pasta), I'm willing to sacrifice a little authenticity! We loved this, and so did Molly (except the corn, which for some reason she doesn't like these days).

Mexican-Style Pasta
Before I give the recipe, here's another tip. Have you ever gotten annoyed when you had to throw away most of a bunch of cilantro, because you couldn't use it fast enough? Thanks to Alton Brown and Simply Recipes for this idea:

Tip #4 for Easier Vegan(ish) Cooking:
When you buy cilantro, snip off the ends of the stems (like you would for fresh flowers). Place the cilantro into a tall Tupperware container or a simple glass. Add water so that the ends of the stems are submerged, but not the leaves. Cover the container - either with a Tupperware top, or with an inverted plastic bag (I use the bag the cilantro came in.) Change the water every day or two. Your cilantro will last TWO WEEKS if you do this. No kidding. Even here in New England, where the cilantro is surely many days old by the time it hits my supermarket. If you're a visual learner, click the Simply Recipes link, above, for pictures.

Super-Easy Mexican-Style Pasta

Ingredients:
  • 1/2 box (8 oz.) whole-wheat pasta (I used angel hair - cooks the fastest)
  • 2 cans Mexican stewed tomatoes (get these if you can - they have a way deeper flavor than spicy diced tomatoes)
  • 1 (15-oz.) can black beans
  • 1 (15-oz.) can corn
  • 1-2 Tbsp. olive oil
  • cilantro (optional)
Directions:
  1. Cook pasta according to package instructions.
  2. While pasta is cooking, put one can of tomatoes (including liquid) into a food processor, blender, or bowl. (I used a bowl and a hand blender.) Pulse until smooth. Add olive oil and blend.
  3. Drain the beans, corn, and the other can of tomatoes.
  4. When pasta is done, drain and put back into pot.
  5. Toss pasta with sauce, non-blended tomatoes, corn, and beans. Stir over medium heat until warmed through.
  6. If desired, garnish with roughly chopped cilantro right before serving.

By the way, this recipe is so not macrobiotic. It contains tomatoes, which true macro people don't eat. And, if I were being a true macro cook, I would soak dry beans and cook them on the stove, and I'd cook organic corn-on-the-cob and cut off the kernels. But I like tomatoes, and they don't trigger migraines for me. So I eat them. And the whole cooking-beans-from-scratch thing (which I do, fairly often, but more on the weekends) and fresh-corn-off-the-cob-thing would kinda NOT make this a 30-minute recipe.

Sunday, March 22, 2009

Day 81: The Key to Good Baked Tempeh

It's been over two weeks since I last posted. I've been very busy with school, and have also been making a concerted effort to be more "there" for my family in the evenings. I get to spend so little time with D and (even worse, because of her 7:30 bedtime) Molly. Running to the computer and sitting there for an hour or two doesn't help!

So this is a quick post, and on this lazy Sunday morning, with Molly playing and D sleeping (Saturday is my sleeping-in day), I'm hoping to bang out a couple more that I can schedule to be posted later in the week.

I'm excited to share with you the newest tip I've discovered, so without further ado...

Easy weekday sandwiches:
Tempeh, hummus, & spinach on sprouted-grain bread


Tip #3 For Better Vegan(ish) Cooking
Before marinating tempeh, cut it into strips and boil it in water for 10 minutes.
Then, drain and marinate one hour before baking.


I got this tip from a tempeh recipe in Veganomicon. They said it would help the marinade to soak into the tempeh, and BOY did it! I even ended up overdoing it the first time I tried this tip - I added too much soy sauce to the marinade, and the tempeh was overly salty. I cut down on the soy sauce the next time, and it was the best baked tempeh we'd ever had.

For marinade ideas, see Day 43 (Spicy Mustard Marinade) or Day 20 (Garlic-Lime Marinade, plus links to several marinade recipes I enjoy.)

After boiling and marinating, place tempeh into a casserole in a single layer. Bake at 350 until it is well-browned (it took me over an hour to bake it, because it was so saturated with marinade.)

And finally, a health update: The first two weeks of March weren't great. Three migraines a week. I had weaned myself off of Inderal, a preventative that I've been taking for years. And I think I was getting a lot of rebound headaches as my body learned to deal with not having this beta-blocker drug in it. But things worked themselves out: I had a migraine yesterday morning, my first in 8 days. Note that even the annoyance of 3 migraines a week is better than the 5 I was getting at the end of 2008...

Saturday, March 7, 2009

Day 66: Indian-Style Coconut Curry (a.k.a. Crudité Curry)

These posts are getting a little fewer and farther-between, as experimentation in the kitchen naturally slows down ... we're starting to repeat some of the dishes that we've really enjoyed!

Last Saturday, we got a babysitter (an all-too-uncommon occurrence these days) and went to a friend's 30th birthday party. It was a pretty big bash, with tons of food. At the end of the party, the birthday boy's mother-in-law was trying to get rid of the leftover grub. She had what must have been at least a whole platter of veggies and dip; we took the veggies and left the mayo- and sour-cream-based dip. It was a huge bag of vegetables, already cut up and ready to be simmered in a giant stock pot. So on Sunday, we made curry!

Indian-Style Coconut Curry (a.k.a Crudité Curry)
Most coconut curries are Thai, but this one uses more Indian curry spices. If you are not a fan of curry powder, just use a little extra of the other spices - but don't add any more fennel; this was very fennel-y as it was.

We also added some veggies from the fridge - bell peppers and eggplant. In the end, we froze about 2/3 of the curry, and still ate off of the remaining 1/3 for three nights. So you may want to cut this recipe in half! As with any curries, don't sweat it if you don't have all the veggies, or if you have some that aren't listed here. Curries are a great fridge-cleaner-outer, and shouldn't be over-planned.

One thing you might want to add, suggested by Donal after we had already finished cooking this, is some chopped-up apple (at the end) or some raisins (at the beginning). A little bit of sweetness would have been nice.

Indian-Style Coconut Curry

Serves at least 12 hungry people!

Ingredients:
1/4 c. canola oil
2 medium onions, chopped
2 pounds firm or extra firm tofu, cut into 1" cubes and drained
2 (14-oz.) cans coconut milk*
1 large (28-oz.) can tomato sauce
1 heaping tsp. ground turmeric
1 t. ground mustard
1 t. fennel seed
1 T. ground coriander
1 T. curry powder
2-3 T. chili paste**
3 bell peppers (we used green, yellow, and red), cut into strips
1 large tomato, chopped (not peeled or seeded)
3 c. broccoli florets
3 c. carrots, chopped
1 large eggplant, cut into biggish cubes
salt to taste
1 1/2 c. sugar snap peas or snow peas

Directions:
  1. Heat the oil in a large stock pot over medium heat. Add onions and cook until softened.
  2. Add tofu and cook for 10 minutes or until starting to brown, stirring occasionally (but try not to break it up)
  3. Add coconut milk and tomato sauce. Stir in spices, adjusting to taste as necessary.
  4. Add all vegetables except the peas. It will look like there isn't enough sauce to match all the veggies, but remember - they will sweat a lot of liquid, thinning out the sauce.
  5. Bring the sauce to a boil, lower heat, cover, and simmer for 1-2 hours, stirring occasionally. The longer the better!
  6. 10 minutes before you take it off the heat, stir in the peas. Serve over brown rice or other whole grain.
*We always use half lite and half regular. Most recipes only call for one can, so we use half a can of each and freeze the rest. I made this recipe with a couple of bags of coconut milk from my freezer, thawed beforehand.
**We used more, but if serving to small kids you should use less. If you can't find this stuff, use a little bit of dried crushed red pepper or some Thai red curry paste - but be careful, both of these substitutes pack more of a punch, so you probably will want to use 1 T. or less.

Monday, March 2, 2009

Day 61: Simple Black Bean Sandwich Filling

I made a very successful coconut curry last night, which I'll blog soon [edited to add: click here for that one!] But first, a quickie.

No picture today, because this dish is ugly! But it tastes good, and it goes inside a sandwich ... so no one cares what it looks like. I made this Black Bean and Green Olive sandwich filling when I realized I had no baked tofu or tempeh for our sandwiches tomorrow. It has three ingredients ... hard to beat that!

Black Bean and Green Olive Sandwich Spread

Ingredients:
3 T. refried black beans (I use the organic, vegetarian ones from Bearitos - they are SO good!)
2-3 jumbo, or 4-5 regular-sized, green olives
1 T. salsa (I use Trader Joe's salsa verde; use something spicier if you want more kick.)

Directions:
  1. Chop olives into small pieces.
  2. Mix all ingredients and spread on pita or firm bread.
This only makes enough for one big sandwich, so scale up as necessary. We used a cabbage-and-broccoli slaw mix on the sandwiches with it. Yum!
 

blogger templates