What is The Vegan(ish) Experiment?

Our family (me, my husband D, and our four-year-old Molly) started 2009 with a mostly-vegan, macrobiotic-inspired diet (although I have to admit, the strict macro rules have pretty much gone out the window). I have seen a marked improvement in my chronic migraines, and I'm enjoying proving that we can make amazing, mouth-watering, memorable food without animal products. For a more in-depth intro, click here.

I stopped updating this blog quite awhile back, when life got in the way. I'm still keeping a mostly vegan kitchen, though, and loving it. Have fun browsing my recipes!

Wednesday, December 2, 2009

Day 336: Mediterranean Pasta

I haven't been around much lately, but I have a very good reason. Unfortunately, I can't announce my exciting news for another couple of weeks, so stay tuned! (To my friends/family who don't already know the news: No, I'm not pregnant.)

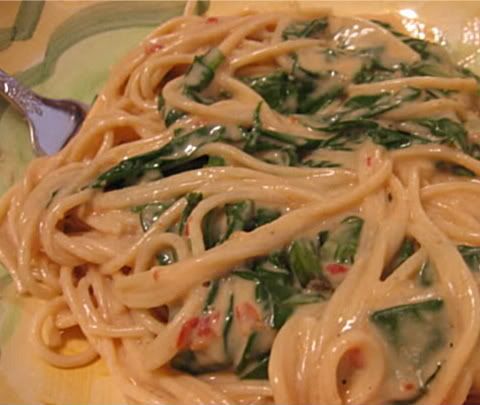
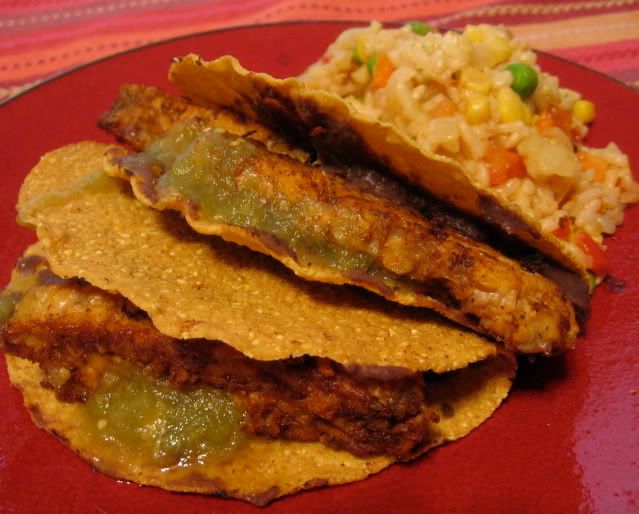
Anyway, if you're annoyed that I'm teasing you with my secret, distract yourself with this dish. It's an easy meal, prepared mostly with pantry staples. (If you want it to taste fresher, though, plan ahead like I did and visit the olive bar at your supermarket - the olives, sundried tomatoes, and roasted garlic can all most likely be found there.)

Update: My secret was that I was spending all of my free time preparing to fulfill one of my life's goals, appearing on the TV quiz show Jeopardy! Unfortunately, I ended up playing against a fantastic guy ... who went on to win that season's Tournament of Champions. Needless to say, I lost. However, I came in second place (and was the only person to get Final Jeopardy right), and it was an awesome experience.
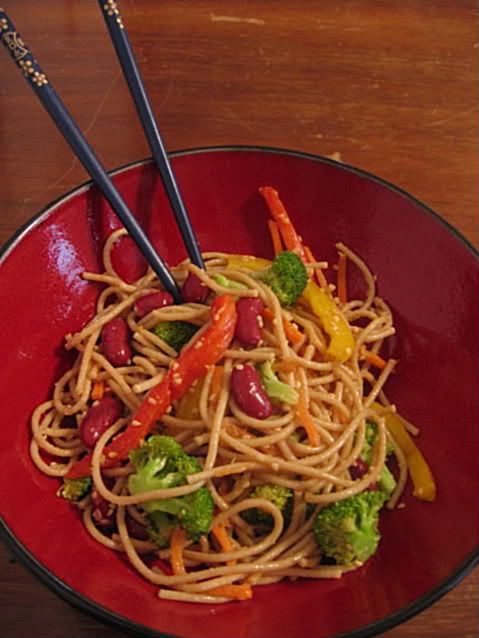
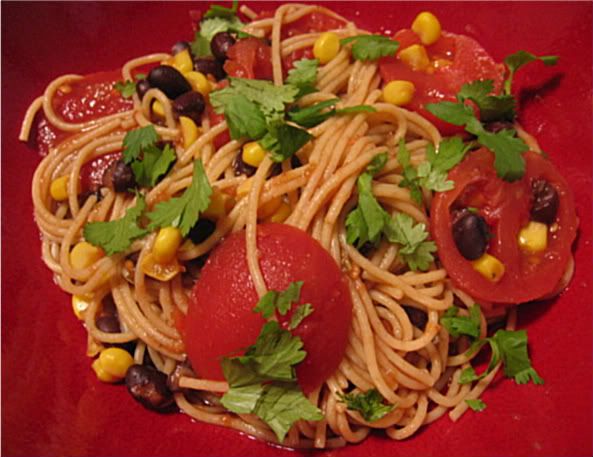
Mediterranean Pasta
Serves 6.

Ingredients:

1 (12 oz.) box whole wheat pasta, prepared according to package instructions
1 (14 oz.) can quartered artichoke hearts, drained well
15-20 olives (I used a combination of kalamata and jumbo green)
2 avocadoes (optional)
pine nuts (optional)

For the sauce:
1 (14 oz.) can tomatoes (diced or not)
4 cloves roasted garlic (more if you love garlic - it's just a mild migraine trigger for me)
10-12 small oil-marinated sun-dried tomatoes, roughly chopped
5 kalamata olives (pitted)
salt and dry crushed red pepper to taste

Directions:
  1. While pasta is cooking, use a blender or food processor to pulse sauce ingredients until they are well-mixed, but still chunky.
  2. When pasta is done, drain and return to pot.
  3. Add olives, artichoke hearts, and sauce to the pasta. Warm over a medium flame until heated through, stirring constantly.
  4. Top with sliced avocado and pine nuts, if you want. (I didn't have pine nuts this time, but have used them in this recipe before and they were great.)

Saturday, November 7, 2009

Day 311: Six Word Saturday!

For an explanation of Six Word Saturday, click here:


And my Six Word Saturday is:

Is H1N1 one word or four?

Looks like our house has been invaded ... so far it's Molly and D. I'm exercising obsessively good hygeine, but feeling pretty pessimistic.

Monday, October 12, 2009

Day 285: Thai Peanut Noodles with Spinach

This recipe is one I whipped up in less than half an hour on a weeknight, when I was short on perishables except for a soon-to-be-old bag of spinach. You could make the recipe without spinach, too, but I like the color and nutritional value it adds.

Thai Peanut Noodles with Spinach

Ingredients:

6 oz. (pre-cooked weight) whole wheat angel hair pasta

1/2 c. smooth peanut butter (I like to use Teddy's, an all-natural brand)
1 can lite coconut milk
1 T. red chili paste (Sambal Oelek chili paste is pretty mild, but if you or your kids are really heat-sensitive, you might want to add a little less)
1 T. brown rice syrup (or 1 t. agave nectar)
2 T. apple cider vinegar
1/4 t. garlic powder
salt to taste

1 10-oz. bag spinach

Directions:
  1. Cook pasta according to package directions.
  2. In a medium saucepan, combine peanut butter and coconut milk. Cook over medium-low heat, stirring frequently, until mixture is smooth.
  3. While peanut butter/coconut milk mixture is heating, place spinach in a microwave-safe container with a couple of tablespoons of water. Cover loosely and microwave for 1-2 minutes, until spinach is wilted.
  4. When peanut butter mixture is smooth, add remaining ingredients and continue to heat over medium-low until warmed through.
  5. Add noodles and spinach to sauce and stir over medium-low flame until the entire mixture is warmed through.

Monday, September 7, 2009

Day 250: Seasoned Kale Chips (Or, How to Get a 2-Year-Old to Eat Greens)

Kale chips have been all the rage in the food blogosphere - I started seeing them a few months ago. "Kale chips? I like kale, but ... kale chips?" was my initial reaction. I read too many good reviews, though, and decided to try and create my own version.

Kale is pretty tasty, but not my favorite green. I usually tend to buy quick-cooking spinach or escarole, or spicy mustard greens, or slow-cooking but oh-so-tasty collards.... Well, needless to say, I like my greens. But kale always just tasted kind of bland to me. And, while I think all greens are beautiful, for some reason this sight never piqued 2-year-old Molly's fancy:

When baked, though, kale turns into something that looks ...well, kind of strange:

Seasoned Kale Chips
But, if you can get past the ugliness, seasoned kale chips are an amazing snack - crunchy, a little salty, savory, and all-around addictive. Bet you can't eat just one ... at least Molly, D, and I couldn't. I must say, it warms a mom's heart to hear her toddler say, "More kale chips, please!"

Ingredients:
2 bunches kale
2-3 T. olive oil
1/4 t. garlic powder
1/4 t. chili powder
1/4 t. coriander
1/4 t. cumin
1/4 t. salt
scant 1/4 t. onion powder

Directions:
  1. Preheat oven to 350º F (about 175º C).
  2. Wash and thoroughly dry kale (a salad spinner works well for this).
  3. Tear kale into large pieces, discarding stems - toss them or save them for stock.
  4. Spread kale onto cookie sheets. Line them with parchment paper first if you want to minimize sticking.
  5. Sprinkle or spray kale lightly with olive oil. Sprinkle with spice mixture.
  6. Bake kale for 9-12 minutes, or until crispy but not burnt.

Monday, August 10, 2009

Day 222: Mustard-Dill Potato and Asparagus Salad

I've been cooking a lot this summer, but not updating this blog as much as I'd like. I'm done teaching summer school now, though, and I have a whole week off before I go back to start the new year. So I'm going to schedule a few blog posts to get me through the first hectic days of the fall semester.

We went to Haymarket last weekend, as we often do, to pick up a ton of inexpensive produce. We found some lovely fingerling and baby red potatoes that I just had to buy ... but what could I make out of them? It's been too hot to do roasted or baked potatoes, and I don't like mayonnaise (or the vegan alternatives), so potato salad seemed out of the question. Until I asked myself, "Hey ... why does potato salad have to have mayo in it?" And this recipe was born:

Mustard-Dill Potato and Asparagus Salad

Ingredients:
About 2 pounds of assorted potatoes, cut into 3/4-inch chunks
1 1/2 bunches asparagus, trimmed* and cut into 1 1/2-inch pieces
1/2 c. chopped chives
1/4 c. chopped dill, not packed

1/4 c. olive oil
zest of one medium lemon
juice of two medium lemons
1 1/2 t. dry ground mustard (or less if you don't like much spice)

salt and pepper

*To trim asparagus, hold both ends. Bend the bottom end until it breaks off. This will get rid of the part that's too tough to eat. You can toss it, compost it, or save it and use it to make your own veggie stock.

Directions:
  1. Put the potato chunks into a large pot. Cover them with water, about an inch above them. Boil until tender (about 15 minutes, depending on how small you cut them).
  2. While the potatoes are boiling, steam the asparagus until it is slightly tender, but still crisp. (I did this by putting it into a microwave-safe dish with a couple of tablespoons of water. My old, low-wattage microwave took 5 minutes. Most would take less.)
  3. Combine potatoes, asparagus, chives, and dill in a large bowl.
  4. Whisk together oil, lemon zest, lemon juice, and mustard. Pour the dressing over the potato mixture and mix well using a rubber spatula or large plastic serving spoon. Be careful not to break up the potatoes too much.
  5. Season with salt and pepper. Chill for at least half an hour before serving.
This was filling enough to be eaten as a main dish, and it got better the longer it sat in the fridge!

Monday, July 27, 2009

Day 208: Fennel-Dill Salad

I love summer, in part because it is the only time of the year when I'm in the mood to eat lots and lots of cold salads. I am a huge cold salad fan ... it just doesn't sound so good when it's freezing outside.

While browsing the produce section of Stop and Shop on Saturday, I had an idea: Wouldn't fennel and dill go well together? I've made fennel salad before, from this fantastic recipe, but it had tarragon in it. So I decided to try and invent a fennel-dill salad. And it was so good. Feel free to add or subtract ingredients; this ended up being a combination of what struck my fancy at the store and what I had sitting in my veggie drawer at home.

Fennel-Dill Salad

Ingredients:

1 bell pepper (I used 1/2 red, and 1/2 green), julinned
2 fennel bulbs, cut in half and sliced thinly (spritz them with lemon juice to keep them from browning)
1/2 bag of broccoli slaw mix (julinned broccoli, carrots, and cabbage), or other cole slaw veggies
1 cucumber, sliced thinly and sprinkled with salt
1 bunch scallions, green parts only, diced
1/2 c. chopped dill

1/3 c. olive oil
juice of 4 very small lemons, or 2 large lemons (about 1/4 c.)
1/4 heaping tsp. celery salt
1 clove minced garlic

Salt & fresh ground black pepper

Instructions:
  • Combine oil, lemon juice, celery salt, and garlic in a food processor or blender.
  • Combine vegetables and dill in a large bowl. (Yes, I know that bell peppers are actually fruits, not vegetables. But I'm calling them vegetables anyway. So there.)
  • Pour dressing over salad and toss. Serve immediately or chill.

Thursday, July 23, 2009

Day 204: How To Make Fruit Unappetizing

This is just a quick laugh for you all - I love finding stuff like this! So cringe-worthy:


I'd hate to see how much they charged if it were ACTUALLY fresh...

Friday, July 17, 2009

Day 198: Shockingly Good Black Bean and Millet Burgers

Note: I have written more posts than usual lately, so if you're stopping by for the first time in a week or two, make sure you check out all of them!

I recently made Chickpea Cakes Piccata from the Happy Herbivore's blog. They were easy and tasty (although I would add only half of the recommended poultry spice next time, and the sauce made too much - I would halve that part of the recipe). "Why don't I make bean cakes more often?" I asked myself.

And out of that question came this recipe. I am prouder of this dish than almost anything else I have created. It was a smashing success (no false modesty here!) It's very healthy and tastes shockingly good. It is now in competition with the veggie burger from The Druid Pub for the Becki's Favorite Veggie Burger blue ribbon. Whether you are vegetarian, vegan, or neither - try this recipe! I wish I could make it for all of my readers.

Black Bean and Millet Burgers
Ingredients:

1/2 cup millet (you can also use another small grain like quinoa, which looks very similar to millet when uncooked - I think even whole grain couscous would work. Cook either according to package instructions.)
1 1/2 cups water
1 pinch salt

1 medium onion, chopped into a few large pieces
1 bell pepper (I used 1/2 red and 1/2 green), seeded and roughly chopped
1/4 t. salt
1 T. canola oil

2 cans black beans, drained (It's okay if they're still kind of wet - just drain through the can lid.)
1 T. cumin
1 t. garlic powder
1 t. salt
About 1/2 cup chopped cilantro
I think it would be tasty to add 1-2 chipotle peppers to the black bean mixture, but haven't tried it yet. If you do, please comment and let me know how it was!

More canola oil
Whole wheat flour

Directions:
  1. Add millet, water, and a pinch of salt to a medium saucepan. Heat on high until boiling, turn heat to low, cover, and simmer for 20-25 minutes until water is absorbed.
  2. While the millet is cooking, use a food processor to mince onion and pepper (do not puree - just pulse until very, very finely minced). If you don't have a food processor, use a blender and do it in batches. A hand blender (immersion blender) would also work.
  3. Heat canola oil on high in a large skillet or sauté pan. Add onions, peppers, and 1/2 t. salt. Cook, stirring frequently, for 5 minutes.
  4. Stir together black beans, cumin, garlic powder, and 1 t. salt. Pulse in a food processor until beans are mostly broken up, but not pureed. Stir cilantro into the mixture.
  5. Combine millet, bean mixture, and onion/pepper mixture in a large mixing bowl. Stir until well-combined. Use your hands to create 6 large or 10 medium-sized patties.
  6. Lightly dip each patty in whole-wheat flour, brushing off any excess.
  7. Brush a large skillet or sauté pan with canola oil. Cook patties on medium heat until browned, flip, and brown the other side (You may want to brush more oil onto the skillet before laying the flipped burger down). It takes several minutes per side. Don't make the burner too hot, or the patties will brown before heating through.
  8. I served the burgers on sprouted-grain (Ezekiel bread) English muffins, topped with avocado slices and store-bought fresh salsa.

Tuesday, July 14, 2009

Day 195: Ginger-Sesame Noodle Salad

I love summer vacation - I have more time to do things like creating new dishes. This one was a pantry/fridge clean-out recipe, and it turned out well! Even Molly (who is very picky these days) liked it.

Ginger-Sesame Noodle Salad

Ingredients:

1-inch (2.5 cm.) piece of ginger, peeled and chopped into a few big pieces
2 t. tamari (or 2 1/2 - 3 t. soy sauce)
2 T. apple cider vinegar
3 T. sesame oil
1/4 c. extra virgin olive oil
1 dash cayenne pepper

1/2 box (about 6-7 oz.) whole wheat spaghetti, cooked according to package instructions*
1 can kidney beans, drained and rinsed
1 bell pepper (I used 1/2 red and 1/2 yellow), julienned into ~1/4-inch strips
1/2 c. julienned carrots (I used pre-packaged ones)
1 1/2 c. broccoli florets, steamed**
1 T. sesame seeds, toasted***

Directions:
  1. Mince the ginger using a food processor, scraping the sides as necessary
  2. Add the next five ingredients and blend until fully emulsified.
  3. Combine all of the other ingredients in a large container, add dressing, seal, and shake until well-tossed.
  4. Chill in the fridge for at least a couple of hours.
*In contrast to white pasta, I usually cook whole wheat pasta using the maximum cooking time (e.g., 11 minutes if it says 9-11 minutes on the box). I find that this helps it not to have such a tough texture.
**I put the florets into a Tupperware container with a tablespoon or so of water, covered them loosely, and microwaved them for 2 minutes in my very slow microwave.
***I put the sesame seeds into a dry pan and shook it over a high burner until they started to brown and become fragrant.

Sunday, July 12, 2009

Day 193: Hobo Veggies and Indoor Camping

D's two daughters (featured in my Caribbean Tabbouleh post) left yesterday. We miss them a ton, but we had a fantastic time while they were here. It's hard having them live so far away.

D took a few days off last week, and we reserved a campsite in the White Mountains for Tuesday and Wednesday. N (the 9-year-old) had studied the Appalachian Trail in school, and was excited to see and hike a small portion of the trail for herself. Our weather here has been depressingly bad this summer, with more wet and cool days than anything else. But it got warm and gorgeous over the 4th of July weekend, so we had high hopes for camping.

And then we watched the weather forecasts. And we watched them and watched them, hoping that somehow they would change. They didn't. We canceled our trip, disappointed but relieved -- it rained hard for two days straight, with big thunderstorms both in Boston and the White Mountains. It would have been a miserable and dangerous couple of days.

So what did we do? Well, you know what they say ... When life gives you lemons, set up a campsite on the enclosed back porch! (Or something like that.) Our 3-4 person tent just barely fit between the walls of the narrow, long room:
We made hobo veggies in the oven, since we didn't have a campfire. (See below for the recipe - these were SO good!)

We fired up the camp stove and sat around it, making pita pizzas and s'mores (both non-vegan). We played cards to the light of camping lanterns and told jokes:

I don't know what made it feel the most like a true camping experience: the plastic smell of the tent, the fold-up chairs, the cheap beer, the flannel shirts that N and I wore, or the s'mores. What I do know is that it's a night that none of us will forget any time soon, probably more memorable in the end than a camping trip would have been.


And now, the recipe (adapted from one here):

Oven-Baked Hobo Veggies

Ingredients:
About 20 small baby potatoes, cut in halves (if very small) or fourths
1 bell pepper, cut into strips
4 carrots, peeled and cut into 1-inch segments
1 medium onion, cut into wedges
Vegan margarine
Garlic powder
Salt and pepper

Directions:
  1. Preheat oven to 350° F (about 170° C).
  2. Cut 4 pieces of aluminum foil, about 18 inches each.
  3. Divide the veggies into fourths, putting one batch in each piece of aluminum foil.
  4. Put 2-4 pats of margarine onto veggies in each packet.
  5. Sprinkle garlic powder on top of each batch of veggies (as much as you like). Season with salt and pepper.
  6. Fold each piece of aluminum foil over the veggies, making a packet to hold in the juices.
  7. Bake packets until potatoes are done (it took 70 minutes for mine.)
Makes four large servings.

Monday, June 29, 2009

Day 180: The Neti Pot

I'm writing a non-food-related post today, about one of my current best friends. I know many of my readers like to live natural lifestyles, so I hope I can convince some of you to get to know this friend of mine:

The Neti Pot
(Not-very-good picture taken with my phone -- camera out of batteries)

Those of you who read my sister's blog will have heard of this strange device. A few months ago, C.Beth posted a courageous picture of herself using a Neti Pot -- a little pitcher that you fill with warm saltwater and use to irrigate your nose and sinuses. I am not as brave as Beth, so I'm not posting a picture of myself using this thing. However, seeing as how she and I are identical twins, her picture will still give you a pretty darn good idea of how I look when I use a Neti Pot.

Saline irrigation has been clinically shown to have positive effects. I am a pretty big skeptic when it comes to alternative therapies -- I like my medicine to be science-based, and I am much more likely to take a clinical-trial-backed prescription than a non-FDA-approved herb -- so I use the Cochrane Report website when I want to find out if a therapy has been shown to be beneficial or not. The Cochrane folks have looked at 8 studies done on nasal saline irrigation, with the result that, "Saline irrigations are well tolerated. Although minor side effects are common, the beneficial effect of saline appears to outweigh these drawbacks for the majority of patients. The use of topical saline could be included as a treatment adjunct for the symptoms of chronic rhinosinusitis."

It is recommended that people with chronic nasal problems (like me, with my allergies) use the Neti Pot every day, twice a day. I'm not that dedicated. But I do try to remember to use it when I get a cold. (I know that the above quote talks about chronic rhinosinusitis, not acute conditions like the common cold. But I couldn't find any studies done regarding irrigation as a therapy for acute conditions, and I figure it can't hurt.)

I got an ear and sinus infection last month after battling a cold ... I hadn't remembered to use my Neti Pot. Then I came down with a cold on Thursday. I started to use the Neti Pot, morning and night. By Friday, it was one of the worst head colds I'd had in a long time. And by Sunday ... it was almost completely gone. I had a similar experience a few months ago, right after I'd gotten my Neti Pot, when it seems to have helped me get over another cold much more quickly than usual.

So, thanks to my wonderful dad who sent me my Neti Pot after seeing my comment on Beth's blog - she's made a believer out of him, and he, in turn, helped convert me! If there's anyone reading who is interested in getting a Neti Pot for themselves, you can usually find them in your local drug store (right by many of the alternative therapies that I usually eschew). Or, get yourself over to any big site like Amazon and order one.

Saturday, June 27, 2009

Day 178: Caribbean Tabbouleh

I haven't been writing, because it was our last few weeks of school. We've been extremely busy. I've been on summer vacation since Thursday, though, and am finally able to spend some quality time in the kitchen.

For the next couple of weeks, I have some help -- my two stepdaughters, visiting from Minnesota:
Nearly-11-year-old C., my sous-chef (she's fantastic at chopping veggies and herbs)

And 9-year-old N., my nanny (she kept Molly busy while C. & I were cooking and D. was at the store)

Luckily, C. and N. are adventurous and were excited to be the guinea pigs as I tried a new invention -- Caribbean Tabbouleh. Like Middle-Eastern tabbouleh (a.k.a. tabouli), it contains bulgur wheat, cucumbers, onions, and a lemon/olive oil dressing. But I also added some Caribbean spices, pineapple, mint, and colorful bell peppers. It turned out fantastic, a bright and fresh dish for summer (which finally seems to be hitting us here in New England, albeit in a very wet way.)

Caribbean Tabbouleh

Ingredients:

1 c. bulgur wheat (I used coarse bulgur)
2 T. olive oil
2 c. boiling water

One 20-oz can pineapple tidbits, well-drained
2 cucumbers, chopped
1 bunch scallions, just the green parts, chopped
1 bell pepper (I acually used half a red one and half a yellow one), seeded and chopped
A handful of fresh mint leaves, chopped

1/2 t. ground allspice
1/4 t. ground ginger
1/4 t. garlic powder
pinch cinnamon
pinch nutmeg
pinch cayenne
salt to taste
Juice of two small lemons (about 3-4 T.)
1/4 c. olive oil

Directions:
  1. In a heat-proof bowl, stir the olive oil into the bulgur. Add the boiling water. Cover and let stand for 15 minutes, then drain.
  2. Allow bulgur to cool, then add all chopped vegetables and herbs.
  3. Whisk lemon juice, vinegar, and spices together. Pour dressing on salad, toss, and chill. (The longer you can chill it, the better ... I think we made it about half an hour before we ate it. It was fantastic, but I expect it will be even better tomorrow, as these types of salads are...)
This makes a good 8 servings or more.

Monday, June 8, 2009

Day 159: Lentil Salad with Cilantro-Cumin Dressing

It's FINALLY warming up here. Supposed to get cool again by the end of the week, but I'm ignoring that fact for now. Warm weather means nice salads at our house - the kind you can make and leave in the fridge for days, and they get better every day. Yum!

This recipe was inspired by the one here (for cooking the lentils) and the one here (one of my favorites). The dressing is so good - I'd definitely make it again for a regular green salad!

Lentil Salad with Cilantro-Cumin Dressing
(The side dish is Simple Cauliflower from 101 Cookbooks - a recipe we just discovered and have made twice in the last week, just because it's so good.)

Ingredients:
2 c. dry lentils
1 small onion, peeled and halved
1 t. minced garlic
1 bay leaf
salt and pepper

3/4 c. cilantro leaves, unpacked
1/2 c. olive oil
1/2 c. lime juice
1 T cumin (I used a little more because I'm a cumin fanatic)
salt to taste

3 small, or two large, multi-colored bell peppers, diced
1 (4-oz.) can diced fire-roasted green chiles
1 (14-oz.) can corn kernels
a bunch scallions, chopped (save the white part for another recipe)

Directions:
  1. Put the lentils, onion, garlic, bay leaf, salt, and pepper in a large pot. Cover with 1 1/2-2 inches water and bring to a boil.
  2. Reduce heat to a simmer and cover. Cook for 30 minutes, or until lentils are tender. Drain if necessary.
  3. While waiting for water to boil, start the dressing: blend cilantro and olive oil in a food processor. Leave at room temperature while lentils are cooking so that the cilantro infuses the oil.
  4. Chop peppers and scallions.
  5. While lentils are draining, finish the salad dressing: add lime juice and cumin to the food processor and blend well. Add salt to taste.
  6. Combine drained lentils, vegetables, and dressing. Season with salt as needed. Chill for at least 30 minutes.

Sunday, May 31, 2009

Day 151: Spinach and Fiddleheads Siciliano

We had a wonderful trip to Los Angeles last weekend, and when I came back, I had to bring my laptop to the Apple Store for repairs. I still haven't gotten it back (it's been 5 days, and they said 5-7 days), so I finally broke down and am writing this post on our desktop at home. (And, just as I had first started this post several hours ago, our iMac started to crash ... I had to find the startup disk in the basement and repair the main volume of the hard drive before I could finish. Sheesh.)

Have you tried fiddleheads? They are baby ferns, only available for a few short weeks starting in May. They look funny, but they are oh-so-tasty. I think they smell kind of like asparagus, but D doesn't agree with me - so you'll just have to try them yourself to see, if you can still find some now that June is upon us! This recipe is inspired by the Escarole Siciliano from AllRecipes.

Spinach and Fiddleheads Siciliano

Ingredients:
1/2 bag (5 oz.) spinach
1 lb. fiddleheads
2 T. capers
6-10 olives, chopped
2 T. canola oil
lemon juice to taste
fresh-ground black pepper

Directions:
  1. Wash the fiddleheads well - I tend to scrub them with my fingers to get all the grimy stuff off. (This is the step that takes the longest!)
  2. Trim any ends off of the fiddleheads that stick out more than half an inch or so. There shouldn't be any long stems.
  3. Heat canola oil over high heat in an extra large sauté pan or large pot.
  4. Stir-fry the fiddelheads until they start to become fragrant (maybe you'll think they smell like asparagus, but maybe you won't) - about 1-2 minutes.
  5. Add spinach and toss well. Cook for another couple of minutes, until spinach is wilted down.
  6. Remove from heat, add capers and olives, and season with lemon juice and pepper until desired taste is achieved.
That's it! Super-easy and SO good.

Monday, May 18, 2009

Day 138: Comfort Food - Pasta Primavera!

One of my favorite comfort food dishes before I went vegan was (I'm so ashamed to admit this) the Campbell's Soup version of Chicken Primavera, made with good ol' Cream of Mushroom. Campbell's is not the most natural product, to say the least. We always got the Healthy Request style soups, because they did not have MSG ... but they did have all kinds of additives to make up for less fat and salt.

So, when I was feeling under the weather last week, I really wanted some comfort food. I decided to adapt the Chickpea Divan recipe from Vegan Spoonful, because its vegan roux makes the base for a really nice creamy sauce.


The verdict: This recipe came together quickly, and I liked it a lot. But not as much as I would've liked it if it had a ton of Parmesan in it, like the original Campbell's recipe. Oh well. I don't really want to go down the road of soy cheese - I try to keep my processed-food intake limited to soy milk and tofu. Maybe next time I will try it with some nutritional yeast, though. Donal thought the sauce was too bland - I didn't agree, but he likes things really spicy or otherwise full of flavor. He added some Vietnamese hot sauce to it, and liked it that way. To each his own!

Be warned: this recipe makes a LOT! Feel free to cut it in half.

Pasta Primavera with Chickpeas

Ingredients:

3/4 c. whole wheat flour
1 t. garlic powder
2 t. salt
1 t. dry thyme
1/2 t. white pepper
1/2 c. vegan margarine
4 c. vegetable broth
1 bag frozen mixed veggies, whatever mixture you like
1 can chickpeas
1/3 c. white wine
1 c. unsweetened soy milk
1 box whole-wheat pasta (we only had couscous, but I would've preferred it on a large pasta like farfalle or penne)
chopped parsley to garnish

Directions:
  1. Begin cooking pasta according to package directions.
  2. Mix the flour, garlic powder, salt, thyme, and pepper.
  3. Melt the margarine over medium heat. When melted, add the flour mixture. Stir well.
  4. Add vegetable broth. Whisk until all lumps are gone.
  5. Add frozen veggies and chickpeas. Cook, stirring frequently, until the sauce becomes bubbly and thick.
  6. When thickened, remove sauce from heat and add white wine and soy milk. Season with black pepper and additional salt if needed, pour over pasta, garnish with parsley, and serve.

Monday, May 11, 2009

Day 131: The Best Tempeh Tacos

I know I've been doing a lot of Mexican food, but I make no apologies! Hopefully some of my readers like it as much as I do.

These tempeh tacos, which I made with the same Spanish rice I blogged last week, were really good. Better than the ones I made back in January, and definitely an easy dish that we will make again and again. The marinading process means planning ahead is a necessity, but once it's time to cook the tempeh, it comes together very quickly.

The Best Tempeh Tacos

Ingredients:
1 (8-oz.) package of tempeh
2 t. dry minced onion
1 t. chili powder
1/4 t. crushed red pepper
1/2 t. garlic powder
1/2 t. oregano
1 t. ground cumin
1 T. tamari (or 4 1/2 t. soy sauce)
2 T. lime juice
2 T. water
2 T. canola oil

Taco shells (I use Bearitos brand, which has no hydrogenated oils or artificial anything)
Other taco fixin's (our fridge was pretty bare, so we just used canned refried beans and salsa. Lettuce or other greens would've been nice, though - or my tangy jicama slaw would have been heavenly!)

Directions:
  1. Slice the tempeh into 1/2-inch slices.
  2. Place tempeh in a small pot and cover with water. Boil for 10 minutes.
  3. Meanwhile, combine all other ingredients except oil. This is your marinade.
  4. Take tempeh out of the water and place in a ziploc bag with the marinade. Refrigerate for at least an hour (I did more like 4 hours)
  5. When finished marinating, heat canola oil in a skillet over medium heat. Fry tempeh until browned on one side. Flip and brown the other side.
  6. Assemble tacos. We heated the shells in at 350° F (about 170° C) for five minutes, lined them with warm refried beans, put a couple of sticks of tempeh in each shell, and covered in salsa.

Monday, May 4, 2009

Day 124: Super-Easy Spanish Rice and Chimichangas

I'm back, and thanks so much to everyone who left sympathy remarks on my last post.

Recently, it was a weeknight and I didn't have any food planned. During the weeks before my mother-in-law passed away, we were spending almost all of our free time at the hospital. Things like meal-planning went by the wayside.

We were in the mood for Mexican food, so I whipped up this:

Super-Easy Spanish Rice and Chimichangas

This meal took about 30 minutes, and was so good. (I wonder if the fact that my "super-easy meals" are often Mexican-inspired is due to my hometown being 10 miles from the Arizona-Mexico border? Not that these recipes are authentic!) This meal was little more fatty than most stuff we cook, but a nice treat when we were in the need of some comfort food. You can always forego frying the chimichanga, and just have it as a burrito, if you want to reduce the fat content.

Super-Easy Spanish Rice

Ingredients:
1 family-sized bag of instant brown rice (I use Success brand, and love it - one bag makes 3 cups rice)
1 onion, chopped
1 cup frozen peas
1 small (8.5-oz.) can of corn
1-1.5 cups chunky salsa (I used the fresh kind available in the produce section)
1 T. canola or olive oil
Chopped cilantro (optional)

Directions:
  1. Cook rice according to package instructions (it takes about 15 minutes, including waiting for the water to boil)
  2. While rice is cooking, chop onion and brown in oil, in a medium saucepan, over medium heat.
  3. One minute before rice is done, add peas to onions. Stir.
  4. When rice is done, add rice, corn, and salsa. Stir over medium heat until heated through.
  5. If desired, or if your cilantro hasn't gone bad like mine had (grr!), remove from heat and stir in chopped cilantro.

Super-Easy Chimichangas

Ingredients:
4 whole-wheat tortillas (warm in microwave for 20 seconds if not soft)
1 can refried black beans (I use Amy's or Bearitos, whichever is cheaper, and love both)
1 cup salsa verde (I'm faithful to the $3 kind from Trader Joe's)
3 T. canola oil

Instructions:
  1. Heat oil in a large skillet on medium-high.
  2. Stir salsa into black beans.
  3. Distribute black beans equally onto all four tortillas.
  4. Roll burritos. Fry in oil until browned on one side, turn, and brown the other side.
  5. Serve with more salsa.

Monday, April 20, 2009

Death in the Family


This is D with his mom, Helen. We lost her yesterday, at the age of 62. We have spent an awful lot of time in the hospital the last few weeks, and the Internet has (rightly) taken backseat. I will return to my frequent comments, tweets, Facebook updates, and (semi-)regular blog posts soon, but I'm not sure when.

I met Helen six years ago today, only three weeks after meeting D. We already knew we would end up married, although it was over two years before we did it. I didn't feel like I knew Helen well until the last several months, though. She was slow to open up to me, and I suppose I was in return, until she became sick and we both started to reach out to each other.

I am so grateful that I was able to really know her, to love her as family, before she died.

I am grateful that Molly loved her Nana and got to see her often.

I am grateful that D and I were by her side when she took her last breaths, and that she was so peaceful and free of pain as it happened.

I am grateful for the ICU nurses, who learned the family members' names and greeted us every time we came to visit. It takes a very special type of person to work in an environment where the private grief of families is so prevalent. They were amazing.

I am grateful for last Sunday, Easter, when Helen had a very good day. She was talking, the breathing tube out for a few days. She knew where she was, and she was able to see and talk to four of her grandchildren. Her room was a celebratory place that day, with Irish folk music playing so loudly that it must have entered the rooms of patients halfway down the hall.

I'm grateful for the funny memories that keep popping up, like when D told me about how his mom used to put him on the handlebars of her bike and ride him to Cub Scouts. And yesterday, when we passed a Christmas Tree Shop (a discount store full of trinkets, figurines, and the like - not all holiday-oriented), and I commented that we should have her memorial there, because she loved it so much. D said that they'd see a dip in their sales now, and we both laughed and cried at that.

We are exhausted, and it hasn't completely sunk in yet. We're discovering that, although we know she is gone, believing it is something altogether different. The belief comes in waves, and I think it will gradually build over the months. Some day, her death will be fully real. I think we're all kind of glad it's not yet.

Saturday, April 4, 2009

Day 94: Macrobiotic Oatmeal Cookies

Way back on Thanksgiving Day, my sister Beth had a blog post that asked readers to say something they were thankful for. Beth was thankful for something starting with the letter A, the first comment was to include a thanks starting with a B, and so on. Whoever got to Z first would win cookies from Beth.

If you are bored, stressed, or otherwise in need of a laugh, go back and read all the comments on Beth's post. I dare you not to giggle. Beth didn't count on me and D hijacking the contest (and D trying to cheat his way to a win by starting with Z and going backwards from there.) In the end, after much family hilarity, I won fair and square by a few seconds.

Every day for months, I looked for my cookies in the mail. If my sweet tooth struck, I would say to myself, "I'm not going to make or buy cookies. Maybe Beth's cookies will come TODAY!" But they didn't.

Just kidding. In reality, I forgot all about the contest. Months later, Beth called me and said, "Your cookies are on the way!" and I said, "What cookies?" She had to remind me about the contest. This was near the end of February, and we'd been staying away from almost all refined sugar since January 1. Ugh. What would we do with an entire batch of cookies?

And then they arrived: Beth had looked online and found a recipe for Macrobiotic Oatmeal Cookies. Gluten-free. Sweetened with maple syrup and pumpkin puree. No added oils, flour, or white sugar. And they were yummy. Just a hint of sweetness, sort of like a really moist granola bar. We actually ate them for breakfast for the next few days.


I got the recipe from Beth and discovered that its measurements were listed by weight, not volume. I could "borrow" one of the digital balances from my school's chemistry lab for awhile (not a good idea, considering the toxic stuff they work with in chem class), or I could do some research on the densities of the ingredients and convert the measurements to teaspoons, tablespoons, and cups. Being a math/science geek, I opted for the latter. I also added cinnamon to the recipe, because everything's better with cinnamon. For those of you who don't think it's fun to do density calculations while you're cooking (you crazy people), I'm posting the adapted recipe here.

Macrobiotic Oatmeal Cookies

This is a great recipe to play around with - what other dried fruits, nuts, and seasonings could you use? I'm thinking a pinch of nutmeg next time ... maybe some chopped pecans ... dried cranberries or chopped dried apricots ... sweet potato puree instead of pumpkin ... Mmm!


Ingredients:
3/4 c. raisins
3/4 c. slivered almonds
2 c. old-fashioned oats
1 - 2 t. cinnamon (Mom, you have permission go crazy and add a whole tablespoon ... I know you will, anyway!)
3 T. maple syrup
1 c. soymilk
1/2 c. pumpkin puree (NOT pumpkin pie filling - just pure pumpkin. You can freeze the leftovers if you use canned.)


Instructions:
  1. Preheat oven to 350° F (about 170° C).
  2. Toast almonds in a dry saucepan over medium heat, stirring constantly, until lightly browned and fragrant. Pour onto a paper towel to cool.
  3. Mix raisins, oats, and half of the cinnamon in a medium-sized mixing bowl. Chop nuts and add them to the mixture.
  4. Pour syrup, soymilk, pumpkin, and the other half of the cinnamon into the same saucepan you used for the nuts. Heat over low flame, stirring, until it boils.
  5. Add the wet ingredients to the dry ingredients. Stir to mix.
  6. Place spoonfuls of cookies on a cookie sheet (you can press them down to make them more crispy and cookie-ish, like Beth did, or keep them more ball-shaped to make them moister and more like a soft granola bar, like I did). Bake for 12 to 15 minutes, until slightly browned.

Sunday, March 29, 2009

Day 88: Super-Easy Mexican-Style Pasta

So much for posting more often. Last week was more busy instead of less! I have a whole pile of yummy food pictures, ready to be posted ... when I find the time.

In an effort to save on groceries, I decided that one meal last week should be assembled from solely pantry ingredients. (Except the cilantro, which I already had in the fridge and needed to use up before it went bad.) This dish isn't traditional Mexican (pasta? huh?). But the flavors are Mexican-inspired. And, taking a scant 30 minutes to prepare (including boiling a big pot of water for the pasta), I'm willing to sacrifice a little authenticity! We loved this, and so did Molly (except the corn, which for some reason she doesn't like these days).

Mexican-Style Pasta
Before I give the recipe, here's another tip. Have you ever gotten annoyed when you had to throw away most of a bunch of cilantro, because you couldn't use it fast enough? Thanks to Alton Brown and Simply Recipes for this idea:

Tip #4 for Easier Vegan(ish) Cooking:
When you buy cilantro, snip off the ends of the stems (like you would for fresh flowers). Place the cilantro into a tall Tupperware container or a simple glass. Add water so that the ends of the stems are submerged, but not the leaves. Cover the container - either with a Tupperware top, or with an inverted plastic bag (I use the bag the cilantro came in.) Change the water every day or two. Your cilantro will last TWO WEEKS if you do this. No kidding. Even here in New England, where the cilantro is surely many days old by the time it hits my supermarket. If you're a visual learner, click the Simply Recipes link, above, for pictures.

Super-Easy Mexican-Style Pasta

Ingredients:
  • 1/2 box (8 oz.) whole-wheat pasta (I used angel hair - cooks the fastest)
  • 2 cans Mexican stewed tomatoes (get these if you can - they have a way deeper flavor than spicy diced tomatoes)
  • 1 (15-oz.) can black beans
  • 1 (15-oz.) can corn
  • 1-2 Tbsp. olive oil
  • cilantro (optional)
Directions:
  1. Cook pasta according to package instructions.
  2. While pasta is cooking, put one can of tomatoes (including liquid) into a food processor, blender, or bowl. (I used a bowl and a hand blender.) Pulse until smooth. Add olive oil and blend.
  3. Drain the beans, corn, and the other can of tomatoes.
  4. When pasta is done, drain and put back into pot.
  5. Toss pasta with sauce, non-blended tomatoes, corn, and beans. Stir over medium heat until warmed through.
  6. If desired, garnish with roughly chopped cilantro right before serving.

By the way, this recipe is so not macrobiotic. It contains tomatoes, which true macro people don't eat. And, if I were being a true macro cook, I would soak dry beans and cook them on the stove, and I'd cook organic corn-on-the-cob and cut off the kernels. But I like tomatoes, and they don't trigger migraines for me. So I eat them. And the whole cooking-beans-from-scratch thing (which I do, fairly often, but more on the weekends) and fresh-corn-off-the-cob-thing would kinda NOT make this a 30-minute recipe.

Sunday, March 22, 2009

Day 81: The Key to Good Baked Tempeh

It's been over two weeks since I last posted. I've been very busy with school, and have also been making a concerted effort to be more "there" for my family in the evenings. I get to spend so little time with D and (even worse, because of her 7:30 bedtime) Molly. Running to the computer and sitting there for an hour or two doesn't help!

So this is a quick post, and on this lazy Sunday morning, with Molly playing and D sleeping (Saturday is my sleeping-in day), I'm hoping to bang out a couple more that I can schedule to be posted later in the week.

I'm excited to share with you the newest tip I've discovered, so without further ado...

Easy weekday sandwiches:
Tempeh, hummus, & spinach on sprouted-grain bread


Tip #3 For Better Vegan(ish) Cooking
Before marinating tempeh, cut it into strips and boil it in water for 10 minutes.
Then, drain and marinate one hour before baking.


I got this tip from a tempeh recipe in Veganomicon. They said it would help the marinade to soak into the tempeh, and BOY did it! I even ended up overdoing it the first time I tried this tip - I added too much soy sauce to the marinade, and the tempeh was overly salty. I cut down on the soy sauce the next time, and it was the best baked tempeh we'd ever had.

For marinade ideas, see Day 43 (Spicy Mustard Marinade) or Day 20 (Garlic-Lime Marinade, plus links to several marinade recipes I enjoy.)

After boiling and marinating, place tempeh into a casserole in a single layer. Bake at 350 until it is well-browned (it took me over an hour to bake it, because it was so saturated with marinade.)

And finally, a health update: The first two weeks of March weren't great. Three migraines a week. I had weaned myself off of Inderal, a preventative that I've been taking for years. And I think I was getting a lot of rebound headaches as my body learned to deal with not having this beta-blocker drug in it. But things worked themselves out: I had a migraine yesterday morning, my first in 8 days. Note that even the annoyance of 3 migraines a week is better than the 5 I was getting at the end of 2008...

Saturday, March 7, 2009

Day 66: Indian-Style Coconut Curry (a.k.a. Crudité Curry)

These posts are getting a little fewer and farther-between, as experimentation in the kitchen naturally slows down ... we're starting to repeat some of the dishes that we've really enjoyed!

Last Saturday, we got a babysitter (an all-too-uncommon occurrence these days) and went to a friend's 30th birthday party. It was a pretty big bash, with tons of food. At the end of the party, the birthday boy's mother-in-law was trying to get rid of the leftover grub. She had what must have been at least a whole platter of veggies and dip; we took the veggies and left the mayo- and sour-cream-based dip. It was a huge bag of vegetables, already cut up and ready to be simmered in a giant stock pot. So on Sunday, we made curry!

Indian-Style Coconut Curry (a.k.a Crudité Curry)
Most coconut curries are Thai, but this one uses more Indian curry spices. If you are not a fan of curry powder, just use a little extra of the other spices - but don't add any more fennel; this was very fennel-y as it was.

We also added some veggies from the fridge - bell peppers and eggplant. In the end, we froze about 2/3 of the curry, and still ate off of the remaining 1/3 for three nights. So you may want to cut this recipe in half! As with any curries, don't sweat it if you don't have all the veggies, or if you have some that aren't listed here. Curries are a great fridge-cleaner-outer, and shouldn't be over-planned.

One thing you might want to add, suggested by Donal after we had already finished cooking this, is some chopped-up apple (at the end) or some raisins (at the beginning). A little bit of sweetness would have been nice.

Indian-Style Coconut Curry

Serves at least 12 hungry people!

Ingredients:
1/4 c. canola oil
2 medium onions, chopped
2 pounds firm or extra firm tofu, cut into 1" cubes and drained
2 (14-oz.) cans coconut milk*
1 large (28-oz.) can tomato sauce
1 heaping tsp. ground turmeric
1 t. ground mustard
1 t. fennel seed
1 T. ground coriander
1 T. curry powder
2-3 T. chili paste**
3 bell peppers (we used green, yellow, and red), cut into strips
1 large tomato, chopped (not peeled or seeded)
3 c. broccoli florets
3 c. carrots, chopped
1 large eggplant, cut into biggish cubes
salt to taste
1 1/2 c. sugar snap peas or snow peas

Directions:
  1. Heat the oil in a large stock pot over medium heat. Add onions and cook until softened.
  2. Add tofu and cook for 10 minutes or until starting to brown, stirring occasionally (but try not to break it up)
  3. Add coconut milk and tomato sauce. Stir in spices, adjusting to taste as necessary.
  4. Add all vegetables except the peas. It will look like there isn't enough sauce to match all the veggies, but remember - they will sweat a lot of liquid, thinning out the sauce.
  5. Bring the sauce to a boil, lower heat, cover, and simmer for 1-2 hours, stirring occasionally. The longer the better!
  6. 10 minutes before you take it off the heat, stir in the peas. Serve over brown rice or other whole grain.
*We always use half lite and half regular. Most recipes only call for one can, so we use half a can of each and freeze the rest. I made this recipe with a couple of bags of coconut milk from my freezer, thawed beforehand.
**We used more, but if serving to small kids you should use less. If you can't find this stuff, use a little bit of dried crushed red pepper or some Thai red curry paste - but be careful, both of these substitutes pack more of a punch, so you probably will want to use 1 T. or less.

Monday, March 2, 2009

Day 61: Simple Black Bean Sandwich Filling

I made a very successful coconut curry last night, which I'll blog soon [edited to add: click here for that one!] But first, a quickie.

No picture today, because this dish is ugly! But it tastes good, and it goes inside a sandwich ... so no one cares what it looks like. I made this Black Bean and Green Olive sandwich filling when I realized I had no baked tofu or tempeh for our sandwiches tomorrow. It has three ingredients ... hard to beat that!

Black Bean and Green Olive Sandwich Spread

Ingredients:
3 T. refried black beans (I use the organic, vegetarian ones from Bearitos - they are SO good!)
2-3 jumbo, or 4-5 regular-sized, green olives
1 T. salsa (I use Trader Joe's salsa verde; use something spicier if you want more kick.)

Directions:
  1. Chop olives into small pieces.
  2. Mix all ingredients and spread on pita or firm bread.
This only makes enough for one big sandwich, so scale up as necessary. We used a cabbage-and-broccoli slaw mix on the sandwiches with it. Yum!

Friday, February 27, 2009

Day 58: New Food Pyramid

The wonderful blog My Year Without Sugar just alerted me to a new food pyramid made just down the road from me, at Harvard.

Here's a low-res picture of it:


I just printed out a higher-resolution version in color here to hang up in my classroom.

Any thoughts? I love it! The old food pyramid let people get away with eating a ton of white carbs and red meat if they wanted to. This one emphasizes whole grains, vegetables, and healthy proteins. Yay!!!

Tuesday, February 24, 2009

Day 55: Vegan Moussaka!

My friend Rachel loaned me her copy of Veganomicon, a huge vegan cookbook. I've made two dishes from this book so far, and it's enough to convince me that I need to buy my own copy. Both dishes were big successes. I think this is one of those cookbooks that you'll find in most vegan kitchens, sort of a Joy of Cooking for plant-eaters. Thanks, Rachel, for the loan!

The first dish I made was vegan moussaka. If you've ever had moussaka at a Greek restaurant, you know that it's sort of like Greek lasagna. No noodles, but it's a layered dish that typically includes tomato sauce, cheese or bechamel sauce, lamb, and eggplant. Considering that half of the ingredients I just listed are animal products, it's hard to imagine how a really good version of this dish could be made in a vegan kitchen. Well, luckily, I didn't have to imagine it - the authors of Veganomicon did it for me! And they kindly gave me permission to reprint the recipe here. It's not a recipe for a weeknight (takes too long), but is completely worth all the work. It would be a crowd-pleaser at a dinner party. Next time I make lasagna, I plan to adapt both the tomato sauce and the pine nut cream from this recipe (subbing Italian spices for the Greek ones).

Vegan Moussaka

(For a much prettier picture, taken by the cookbook authors, click here.)Scroll to the bottom of this post for the recipe, try it, and see if you don't go and buy the cookbook yourself!

The second recipe I tried was a lot easier, and will definitely be part of our repertoire from now on:
Plantain and Pinto Bean Stew with Parsnip Chips

Thanks to D for making this with me! The spiciness was just right (for us - unfortunately too much of a bite for Molly), and the plantains were a perfect addition. You'll have to buy the cookbook for this recipe, though.

Eggplant-Potato Moussaka with Pine Nut Cream

From Veganomicon, used with permission. My comments are underlined.

Serves 6 to 8
Time 1 hour 20 minutes (or 2 hours if you have a toddler and/or are not very fast with a knife)

Vegetable Layer:
1 pound eggplant (I found this to be 1 not-too-big, but maybe bigger-than-medium, eggplant)
1 pound zucchini (For me this was 3 small zucchinis. Probably 2 big ones.)
1 1/2 lbs. Russet or baking potatoes (6 medium russet potatoes for me)
1/4 c. olive oil (I didn't measure)

Sauce:
1/4 c. olive oil (I used less)
4 large shallots, sliced thin (I used one medium onion)
3 cloves garlic, minced
1/3 c. vegetable broth or red wine (I used white cooking wine, which was good)
2 (15-oz) cans crushed tomatoes, with juice (I used 1 28-oz can)
2 t. dried oregano
1/4 t. ground cinnamon (I used less - D isn't a huge fan - I guess he does have SOME faults.)
1 bay leaf
Salt (I actually didn't have to add any, probably because I assume there was some in the canned tomatoes)

Pine Nut Cream (The BEST part! So good!)
1 lb. soft silken tofu (I used NaSoya 50% less fat)
1/2 c. pine nuts, plus additional for garnish (optional - I didn't do this because I only bought a 1/2-c. bag, at $3! Does anyone know any cheaper sources for pine nuts?)
3 T. lemon juice
1 t. arrowroot powder (I didn't need this. If you do need it and don't have any, you can use 1/2 heaping t. cornstarch)
1 clove garlc
pinch of freshly grated nutmeg (add more at the end if you can't taste it - I had to)
1 1/4 t. salt, or to taste
white pepper (I probably shook in a good 1/4-1/2 t, and it had a nice bite. By the way, white pepper at the supermarket was $6. I got some at the Armenian store, probably as much as 2 supermarket containers, for $1.80!)

1/2 c. dry, fine white bread crumbs (I used coarse, whole-wheat panko crumbs - and it was yummy!)

PREHEAT THE oven to 400. Lightly oil three baking sheets or shallow pans. (I used cookie sheets lined with foil for easy clean-up.)

Prepare the vegetables:
Wash the eggplant and zucchini, and trim the stems. Scrub and peel the potatoes. Slice the eggplant, zuchinni, and potatoes lengthwise into approximately 1/4-inch-thick slices. (Yes, long slices - they will be layered, so don't worry if they are cut sloppily. Just try to keep not too thick, and not too thin. Too thin on the eggplant, I discovered, makes it stick to the pan when you roast it.) Rub the eggpland slices with a little salt and set aside in a colander in the sink or in a big bowl for about 15 minutes to drain. Briefly rinse with cold water and pat dry with a paper towel. (I forgot the rinsing step! But the salt made the eggplant really good, and there's not much salt in this recipe, so I'll probably skip the rinsing next time too.)

Place each vegetable on a separate baking sheet. Distribute the 1/4 c. oil among the three sheets and sprinkle the vegetables with salt (except the eggplant, if salted already. I forgot to salt the other veggies, and did not find the recipe to need any more salt. So will probably skip this next time, too.) Toss to coat the vegetables on each sheet, making sure each piece is completely coated with oil. (This is easy if you've lined the sheets with foil - you can grab both ends of the foil and fold them together to toss the veggies.) Drizzle a little extra oil on the eggplant, as it has a slight tendency to stick (or place the eggpland slices on oiled baking parchment. I don't have any parchment, but may get some for next time, because they really do stick.) Spread out the vegetables on each sheet; some overlapping is okay. Roast the pans of zucchini and eggplant for 15 minutes, or until tender. Roast the potatoes for about 20 to 22 minutes, until the edges are lightly browned. Allow the vegetables to cool. (Once cooled, if the zucchini is watery, blot excess liquid with a paper towel so that the casserole is not too wet. I also blotted the oil off of the potatoes.)

While the vegetables are cooking, prepare the tomato sauce:
Combine the remaining 1/4 c. olive oil and minced garlic in a heavy-bottomed saucepan. Heat over medium heat and let the garlic sizzle for about 30 seconds, then add the shallots and cook until soft and translucent, 3 to 4 minutes. Add the wine and simmer until slightly reduced, another 3 minutes. Add the crushed tomatoes, oregano, ground cinnamon, and bay leaf. Partially cover and simmer over medium-low heat for 12 to 14 minutes, stirring occasionally. The sauce should reduce slightly. Turn off the heat, remove the bay leaf, and adjust the salt (if necessary.)

Make the pine nut cream:
In a food processor, blend the pine nuts and lemon juice, scraping the sides of the bowl with a rubber spatula, until a creamy paste forms. (Do NOT use the immersion blender, unless you want little bits of pine nuts all over one area of the kitchen. Which you will then be finding for months. Use the food-processor attachment.) Add the tofu (at this point, I put it all in a mixing bowl and switched over to the blender attachment), garlic, arrowroot (or corn starch, or nothing), nutmeg, salt, and white pepper. Blend until creamy and smooth. Taste it and feel your eyes widen at the shock that there is no cream in this creamy sauce.

Lightly oil a 9x13-inch pan and preheat the oven again to 400, if necessary. Spread 1/4 cup of tomato sauce on the pan, then add successive layers in order of half the eggplant, half of remaining sauce, and half the breadcrumbs. Spread all the zucchini on top of this. Top with a final layer each of eggplant, potatoes, sauce, and bread crumbs. Use a rubber spatula to evenly spread the pine nut cream over the entire top layer. Scatter a few pine nuts on top, if desired.

Bake for 35 to 40 minutes, until the top is lightly browned and a few cracks have formed in the topping. Allow to cool 10 minutes before slicing and serving.

Monday, February 16, 2009

Day 47: Vegan Sloppy Joes

I made Sloppy Joes for dinner on Valentine's Day. Is that unromantic? Well, at least they're red ... And D and I got a babysitter and got to go out the next night, which was perfect.

This dish was very successful, in large part because of this amazing organic ketchup that I found. It's sweetened with agave nectar instead of the unfortunate high-fructose corn syrup that American companies generally use. I'm not a big ketchup fan ... or I wasn't until I tasted this stuff! The flavor is so good - way more tomato-y than other brands, a little spicy (but not hot), and a little sweet. I'll never buy Heinz again.
So, Sloppy Joes ... the real test is, does the 2-year-old like them? A properly-made Sloppy Joe will be a hit with any kid. Molly's been a picky eater lately, so I had my fingers crossed. You tell me if you think she liked them:


Hopefully that convinced you, and you'll make this easy-and-tasty dish yourself. D and I loved it, too. By the way, I was inspired by a recipe over at Simply Recipes, which I made in the past. But I wasn't crazy about the spice mixture in that one, so I improvised. And of course, that recipe isn't anywhere close to being vegan ...

Vegan Sloppy Joes

Ingredients:
2 T. olive oil
1 medium or large onion, diced
1 medium carrot, diced
2 small (or 1 large) stalks celery, diced
3-4 cloves minced garlic
1/3 cup agave-sweetened ketchup (or at least organic, sugar-sweetened if you can't find the really good stuff)
1 large (28-oz.) can tomato sauce
1/4 t. cinnamon (less if you aren't a huge fan - you can really taste it)
1/4 t. ground sage
salt to taste
2 (15-oz) cans beans (I used one can garbanzo, and 1 can kidney), drained
6 Whole-wheat sandwich rolls or hamburger buns (the least nutritionally-iffy ones at my supermarket were Thomas' mini bagel buns. Sort of a cross between a bagel and a hamburger bun.)
Vegan margarine


Instructions:
  1. Saute onions in oil, over medium heat, until translucent.
  2. Add carrot and celery and cook for 4 minutes.
  3. Add garlic and cook 1-2 minutes.
  4. Add ketchup and tomato sauce. Stir until well-blended.
  5. Add cinnamon and sage. Stir well. Add salt to taste.
  6. Add beans. Stir and bring to a boil. Turn down heat and simmer 10-20 minutes (the longer the better).
  7. Toast and butter bread. Serve open-faced, with the Sloppy Joe sauce poured over both halves of the bun.
I think this sauce would be good over rice as well, or even added to a macaroni bake. But then it would be called something other than "Sloppy Joes" ...

Thursday, February 12, 2009

Day 43: Spicy Mustard Marinade

Have you got one of those awful colds that seems to have caught everyone? (I personally like to think a cold catches me, rather than the other way around!) I have it, D had it, and Molly got it so bad that it turned into an ear infection. My little two-year-old is on antibiotics for the first time in her young life.

Anyway, this marinade will clear your sinuses faster than you can say, "Achoo!" It's spicy and oh-so-good. Nice to invent something successful, after the bland garam masala marinade I attempted a couple of weeks ago (and tried again last week, with only marginal success). Reduce the cayenne and crushed red pepper, or just replace the cayenne with chili powder, if you like things less fiery.

Baked Tofu and Tempeh with Spicy Mustard Marinade

Spicy Mustard Marinade
Ingredients:
1/4 c. soy sauce
2 T. lime juice
1 T. dijon mustard (I like the seeded kind)
1/4 t. cayenne pepper
a few good shakes dried crushed red pepper
1/4 t. dry mustard

Directions:
Stir well. If using as a marinade for baked tofu or tempeh, follow my recipe here. I marinated the tofu for a couple of hours, which was wonderful. But the tempeh only got about 10 minutes, as I didn't realize we were out and had to go buy more. It was still excellent. I sliced it very thin this time, which I think helps. The baked tofu link has some ideas for sandwiches, too. (The White Bean & Caper spread from my previous post also goes nicely with this, balancing out the spiciness.)

Wednesday, February 11, 2009

Day 42: White Bean & Caper Dip with Rosemary-Garlic Pita Chips

I'm not sick of hummus yet, but was ready for a change. So this week I made a big batch of white beans (soaked overnight this time - gotta love foresight) and experimented. The resulting dip looked like mashed potatoes. I'm not sure if that's a good thing, but it didn't taste like them, which I think is for the best. The dip isn't incredibly strong in flavor, but is complex and mouth-watering. Molly even liked it, which surprised me because of the caper flavor. And the chips ... well, who can say no to pita chips?

White Bean & Caper Dip with Rosemary-Garlic Pita Chips
Here are the recipes:

White Bean & Caper Dip or Spread
Ingredients:
about 2.5 cups of white beans (3/4 cup dried beans)
4 cloves garlic, minced
1 T. capers, drained
1/4 c. olive oil
2-3 T. lemon juice
salt to taste
water

Directions:
  1. Soak and cook beans according to package instructions (or use the quick-soak method, or just use 2 cans of beans - I used Goya Small White Beans and added a strip of kombu, removed at the end).
  2. Use a food processor or hand blender to thoroughly mix all ingredients.
  3. Salt to taste
  4. I made this thick, because we use it as a sandwich spread as well as a dip. But you can add water, a couple of tablespoons at a time, if you want it creamier and thinner.
Rosemary-Garlic Pita Chips
Ingredients:
6 small, or 4 large, whole-wheat pitas
2 T. olive oil
1/4 - 1/2 t. garlic powder
1 T. dried rosemary
1/4 t. salt

Directions:
  1. Preheat oven to 350° F (175 ° C).
  2. Cut pitas into eighths.
  3. Mix other ingredients in a large zip-top bag.
  4. Add pita to the bag and shake until well-coated.
  5. Place chips on a foil-lined cookie sheet and bake until crispy, turning once, about 15-20 minutes.
 

blogger templates