
What is The Vegan(ish) Experiment?

Our family (me, my husband D, and our four-year-old Molly) started 2009 with a mostly-vegan, macrobiotic-inspired diet (although I have to admit, the strict macro rules have pretty much gone out the window). I have seen a marked improvement in my chronic migraines, and I'm enjoying proving that we can make amazing, mouth-watering, memorable food without animal products. For a more in-depth intro, click here.

I stopped updating this blog quite awhile back, when life got in the way. I'm still keeping a mostly vegan kitchen, though, and loving it. Have fun browsing my recipes!

Monday, June 29, 2009

Day 180: The Neti Pot

I'm writing a non-food-related post today, about one of my current best friends. I know many of my readers like to live natural lifestyles, so I hope I can convince some of you to get to know this friend of mine:

The Neti Pot
(Not-very-good picture taken with my phone -- camera out of batteries)

Those of you who read my sister's blog will have heard of this strange device. A few months ago, C.Beth posted a courageous picture of herself using a Neti Pot -- a little pitcher that you fill with warm saltwater and use to irrigate your nose and sinuses. I am not as brave as Beth, so I'm not posting a picture of myself using this thing. However, seeing as how she and I are identical twins, her picture will still give you a pretty darn good idea of how I look when I use a Neti Pot.

Saline irrigation has been clinically shown to have positive effects. I am a pretty big skeptic when it comes to alternative therapies -- I like my medicine to be science-based, and I am much more likely to take a clinical-trial-backed prescription than a non-FDA-approved herb -- so I use the Cochrane Report website when I want to find out if a therapy has been shown to be beneficial or not. The Cochrane folks have looked at 8 studies done on nasal saline irrigation, with the result that, "Saline irrigations are well tolerated. Although minor side effects are common, the beneficial effect of saline appears to outweigh these drawbacks for the majority of patients. The use of topical saline could be included as a treatment adjunct for the symptoms of chronic rhinosinusitis."

It is recommended that people with chronic nasal problems (like me, with my allergies) use the Neti Pot every day, twice a day. I'm not that dedicated. But I do try to remember to use it when I get a cold. (I know that the above quote talks about chronic rhinosinusitis, not acute conditions like the common cold. But I couldn't find any studies done regarding irrigation as a therapy for acute conditions, and I figure it can't hurt.)

I got an ear and sinus infection last month after battling a cold ... I hadn't remembered to use my Neti Pot. Then I came down with a cold on Thursday. I started to use the Neti Pot, morning and night. By Friday, it was one of the worst head colds I'd had in a long time. And by Sunday ... it was almost completely gone. I had a similar experience a few months ago, right after I'd gotten my Neti Pot, when it seems to have helped me get over another cold much more quickly than usual.

So, thanks to my wonderful dad who sent me my Neti Pot after seeing my comment on Beth's blog - she's made a believer out of him, and he, in turn, helped convert me! If there's anyone reading who is interested in getting a Neti Pot for themselves, you can usually find them in your local drug store (right by many of the alternative therapies that I usually eschew). Or, get yourself over to any big site like Amazon and order one.

Saturday, June 27, 2009

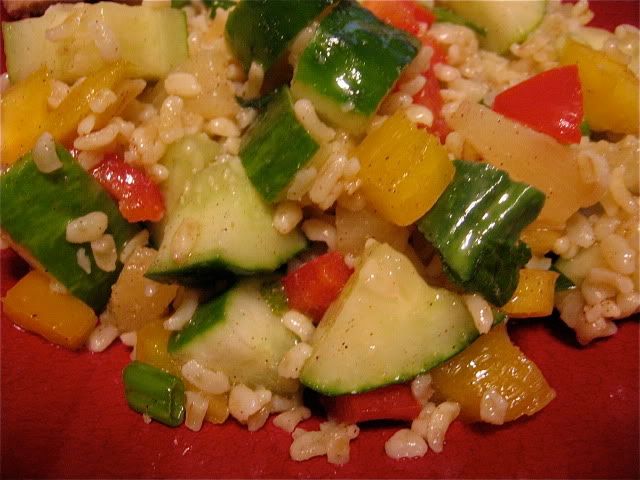
Day 178: Caribbean Tabbouleh

I haven't been writing, because it was our last few weeks of school. We've been extremely busy. I've been on summer vacation since Thursday, though, and am finally able to spend some quality time in the kitchen.

For the next couple of weeks, I have some help -- my two stepdaughters, visiting from Minnesota:
Nearly-11-year-old C., my sous-chef (she's fantastic at chopping veggies and herbs)

And 9-year-old N., my nanny (she kept Molly busy while C. & I were cooking and D. was at the store)

Luckily, C. and N. are adventurous and were excited to be the guinea pigs as I tried a new invention -- Caribbean Tabbouleh. Like Middle-Eastern tabbouleh (a.k.a. tabouli), it contains bulgur wheat, cucumbers, onions, and a lemon/olive oil dressing. But I also added some Caribbean spices, pineapple, mint, and colorful bell peppers. It turned out fantastic, a bright and fresh dish for summer (which finally seems to be hitting us here in New England, albeit in a very wet way.)

Caribbean Tabbouleh

Ingredients:

1 c. bulgur wheat (I used coarse bulgur)
2 T. olive oil
2 c. boiling water

One 20-oz can pineapple tidbits, well-drained
2 cucumbers, chopped
1 bunch scallions, just the green parts, chopped
1 bell pepper (I acually used half a red one and half a yellow one), seeded and chopped
A handful of fresh mint leaves, chopped

1/2 t. ground allspice
1/4 t. ground ginger
1/4 t. garlic powder
pinch cinnamon
pinch nutmeg
pinch cayenne
salt to taste
Juice of two small lemons (about 3-4 T.)
1/4 c. olive oil

Directions:
  1. In a heat-proof bowl, stir the olive oil into the bulgur. Add the boiling water. Cover and let stand for 15 minutes, then drain.
  2. Allow bulgur to cool, then add all chopped vegetables and herbs.
  3. Whisk lemon juice, vinegar, and spices together. Pour dressing on salad, toss, and chill. (The longer you can chill it, the better ... I think we made it about half an hour before we ate it. It was fantastic, but I expect it will be even better tomorrow, as these types of salads are...)
This makes a good 8 servings or more.

Monday, June 8, 2009

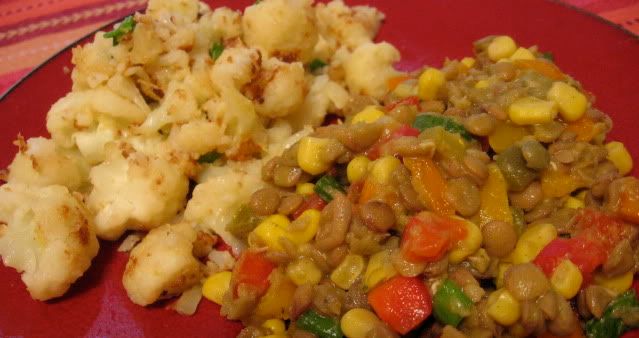
Day 159: Lentil Salad with Cilantro-Cumin Dressing

It's FINALLY warming up here. Supposed to get cool again by the end of the week, but I'm ignoring that fact for now. Warm weather means nice salads at our house - the kind you can make and leave in the fridge for days, and they get better every day. Yum!

This recipe was inspired by the one here (for cooking the lentils) and the one here (one of my favorites). The dressing is so good - I'd definitely make it again for a regular green salad!

Lentil Salad with Cilantro-Cumin Dressing
(The side dish is Simple Cauliflower from 101 Cookbooks - a recipe we just discovered and have made twice in the last week, just because it's so good.)

Ingredients:
2 c. dry lentils
1 small onion, peeled and halved
1 t. minced garlic
1 bay leaf
salt and pepper

3/4 c. cilantro leaves, unpacked
1/2 c. olive oil
1/2 c. lime juice
1 T cumin (I used a little more because I'm a cumin fanatic)
salt to taste

3 small, or two large, multi-colored bell peppers, diced
1 (4-oz.) can diced fire-roasted green chiles
1 (14-oz.) can corn kernels
a bunch scallions, chopped (save the white part for another recipe)

Directions:
  1. Put the lentils, onion, garlic, bay leaf, salt, and pepper in a large pot. Cover with 1 1/2-2 inches water and bring to a boil.
  2. Reduce heat to a simmer and cover. Cook for 30 minutes, or until lentils are tender. Drain if necessary.
  3. While waiting for water to boil, start the dressing: blend cilantro and olive oil in a food processor. Leave at room temperature while lentils are cooking so that the cilantro infuses the oil.
  4. Chop peppers and scallions.
  5. While lentils are draining, finish the salad dressing: add lime juice and cumin to the food processor and blend well. Add salt to taste.
  6. Combine drained lentils, vegetables, and dressing. Season with salt as needed. Chill for at least 30 minutes.

Sunday, May 31, 2009

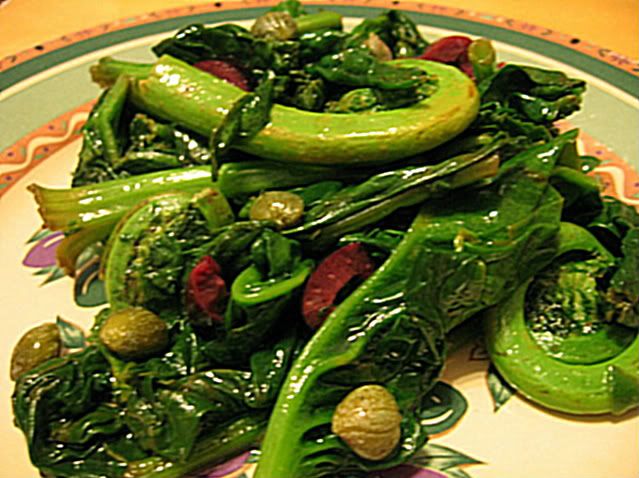
Day 151: Spinach and Fiddleheads Siciliano

We had a wonderful trip to Los Angeles last weekend, and when I came back, I had to bring my laptop to the Apple Store for repairs. I still haven't gotten it back (it's been 5 days, and they said 5-7 days), so I finally broke down and am writing this post on our desktop at home. (And, just as I had first started this post several hours ago, our iMac started to crash ... I had to find the startup disk in the basement and repair the main volume of the hard drive before I could finish. Sheesh.)

Have you tried fiddleheads? They are baby ferns, only available for a few short weeks starting in May. They look funny, but they are oh-so-tasty. I think they smell kind of like asparagus, but D doesn't agree with me - so you'll just have to try them yourself to see, if you can still find some now that June is upon us! This recipe is inspired by the Escarole Siciliano from AllRecipes.

Spinach and Fiddleheads Siciliano

Ingredients:
1/2 bag (5 oz.) spinach
1 lb. fiddleheads
2 T. capers
6-10 olives, chopped
2 T. canola oil
lemon juice to taste
fresh-ground black pepper

Directions:
  1. Wash the fiddleheads well - I tend to scrub them with my fingers to get all the grimy stuff off. (This is the step that takes the longest!)
  2. Trim any ends off of the fiddleheads that stick out more than half an inch or so. There shouldn't be any long stems.
  3. Heat canola oil over high heat in an extra large sauté pan or large pot.
  4. Stir-fry the fiddelheads until they start to become fragrant (maybe you'll think they smell like asparagus, but maybe you won't) - about 1-2 minutes.
  5. Add spinach and toss well. Cook for another couple of minutes, until spinach is wilted down.
  6. Remove from heat, add capers and olives, and season with lemon juice and pepper until desired taste is achieved.
That's it! Super-easy and SO good.

Monday, May 18, 2009

Day 138: Comfort Food - Pasta Primavera!

One of my favorite comfort food dishes before I went vegan was (I'm so ashamed to admit this) the Campbell's Soup version of Chicken Primavera, made with good ol' Cream of Mushroom. Campbell's is not the most natural product, to say the least. We always got the Healthy Request style soups, because they did not have MSG ... but they did have all kinds of additives to make up for less fat and salt.

So, when I was feeling under the weather last week, I really wanted some comfort food. I decided to adapt the Chickpea Divan recipe from Vegan Spoonful, because its vegan roux makes the base for a really nice creamy sauce.


The verdict: This recipe came together quickly, and I liked it a lot. But not as much as I would've liked it if it had a ton of Parmesan in it, like the original Campbell's recipe. Oh well. I don't really want to go down the road of soy cheese - I try to keep my processed-food intake limited to soy milk and tofu. Maybe next time I will try it with some nutritional yeast, though. Donal thought the sauce was too bland - I didn't agree, but he likes things really spicy or otherwise full of flavor. He added some Vietnamese hot sauce to it, and liked it that way. To each his own!

Be warned: this recipe makes a LOT! Feel free to cut it in half.

Pasta Primavera with Chickpeas

Ingredients:

3/4 c. whole wheat flour
1 t. garlic powder
2 t. salt
1 t. dry thyme
1/2 t. white pepper
1/2 c. vegan margarine
4 c. vegetable broth
1 bag frozen mixed veggies, whatever mixture you like
1 can chickpeas
1/3 c. white wine
1 c. unsweetened soy milk
1 box whole-wheat pasta (we only had couscous, but I would've preferred it on a large pasta like farfalle or penne)
chopped parsley to garnish

Directions:
  1. Begin cooking pasta according to package directions.
  2. Mix the flour, garlic powder, salt, thyme, and pepper.
  3. Melt the margarine over medium heat. When melted, add the flour mixture. Stir well.
  4. Add vegetable broth. Whisk until all lumps are gone.
  5. Add frozen veggies and chickpeas. Cook, stirring frequently, until the sauce becomes bubbly and thick.
  6. When thickened, remove sauce from heat and add white wine and soy milk. Season with black pepper and additional salt if needed, pour over pasta, garnish with parsley, and serve.

Monday, May 11, 2009

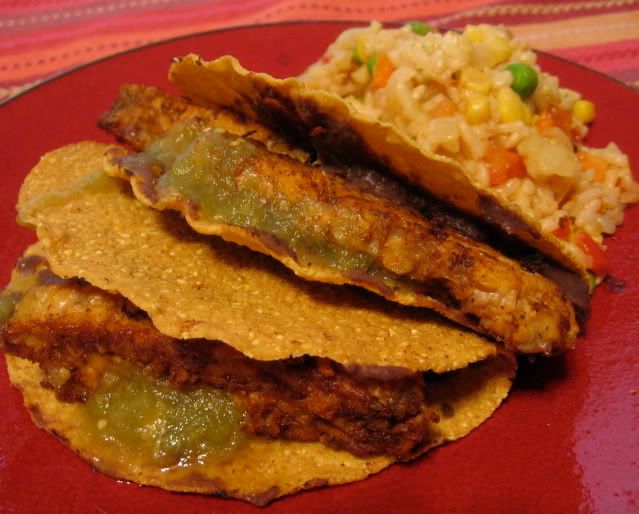
Day 131: The Best Tempeh Tacos

I know I've been doing a lot of Mexican food, but I make no apologies! Hopefully some of my readers like it as much as I do.

These tempeh tacos, which I made with the same Spanish rice I blogged last week, were really good. Better than the ones I made back in January, and definitely an easy dish that we will make again and again. The marinading process means planning ahead is a necessity, but once it's time to cook the tempeh, it comes together very quickly.

The Best Tempeh Tacos

Ingredients:
1 (8-oz.) package of tempeh
2 t. dry minced onion
1 t. chili powder
1/4 t. crushed red pepper
1/2 t. garlic powder
1/2 t. oregano
1 t. ground cumin
1 T. tamari (or 4 1/2 t. soy sauce)
2 T. lime juice
2 T. water
2 T. canola oil

Taco shells (I use Bearitos brand, which has no hydrogenated oils or artificial anything)
Other taco fixin's (our fridge was pretty bare, so we just used canned refried beans and salsa. Lettuce or other greens would've been nice, though - or my tangy jicama slaw would have been heavenly!)

Directions:
  1. Slice the tempeh into 1/2-inch slices.
  2. Place tempeh in a small pot and cover with water. Boil for 10 minutes.
  3. Meanwhile, combine all other ingredients except oil. This is your marinade.
  4. Take tempeh out of the water and place in a ziploc bag with the marinade. Refrigerate for at least an hour (I did more like 4 hours)
  5. When finished marinating, heat canola oil in a skillet over medium heat. Fry tempeh until browned on one side. Flip and brown the other side.
  6. Assemble tacos. We heated the shells in at 350° F (about 170° C) for five minutes, lined them with warm refried beans, put a couple of sticks of tempeh in each shell, and covered in salsa.

Monday, May 4, 2009

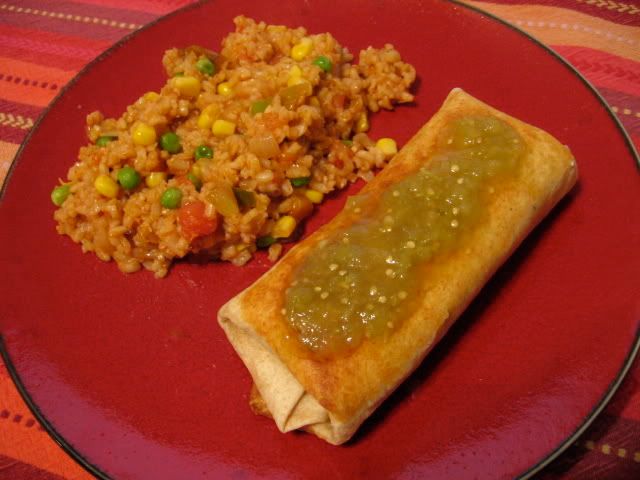
Day 124: Super-Easy Spanish Rice and Chimichangas

I'm back, and thanks so much to everyone who left sympathy remarks on my last post.

Recently, it was a weeknight and I didn't have any food planned. During the weeks before my mother-in-law passed away, we were spending almost all of our free time at the hospital. Things like meal-planning went by the wayside.

We were in the mood for Mexican food, so I whipped up this:

Super-Easy Spanish Rice and Chimichangas

This meal took about 30 minutes, and was so good. (I wonder if the fact that my "super-easy meals" are often Mexican-inspired is due to my hometown being 10 miles from the Arizona-Mexico border? Not that these recipes are authentic!) This meal was little more fatty than most stuff we cook, but a nice treat when we were in the need of some comfort food. You can always forego frying the chimichanga, and just have it as a burrito, if you want to reduce the fat content.

Super-Easy Spanish Rice

Ingredients:
1 family-sized bag of instant brown rice (I use Success brand, and love it - one bag makes 3 cups rice)
1 onion, chopped
1 cup frozen peas
1 small (8.5-oz.) can of corn
1-1.5 cups chunky salsa (I used the fresh kind available in the produce section)
1 T. canola or olive oil
Chopped cilantro (optional)

Directions:
  1. Cook rice according to package instructions (it takes about 15 minutes, including waiting for the water to boil)
  2. While rice is cooking, chop onion and brown in oil, in a medium saucepan, over medium heat.
  3. One minute before rice is done, add peas to onions. Stir.
  4. When rice is done, add rice, corn, and salsa. Stir over medium heat until heated through.
  5. If desired, or if your cilantro hasn't gone bad like mine had (grr!), remove from heat and stir in chopped cilantro.

Super-Easy Chimichangas

Ingredients:
4 whole-wheat tortillas (warm in microwave for 20 seconds if not soft)
1 can refried black beans (I use Amy's or Bearitos, whichever is cheaper, and love both)
1 cup salsa verde (I'm faithful to the $3 kind from Trader Joe's)
3 T. canola oil

Instructions:
  1. Heat oil in a large skillet on medium-high.
  2. Stir salsa into black beans.
  3. Distribute black beans equally onto all four tortillas.
  4. Roll burritos. Fry in oil until browned on one side, turn, and brown the other side.
  5. Serve with more salsa.


blogger templates